Recipes

Recipes To Reduce Food Waste

Special thanks to Slow Food Urban San Diego volunteer Jenny Ikoma for these great food waste fighting recipes!

Cooking With Rind

How to get the most out of your food and reduce waste.

Parmesan is a wonderful ingredient in the kitchen but did you know that you can use the rind as well? Stop wasting those precious rinds and save them up in the freezer for some amazing uses. The natural rinds of cheeses like Parmesan, Pecorino, and Romano is air dried like a crust and edible. The rinds can be used to flavor soups, stews, rice and bean dishes almost like bay leaves. Parmesan rinds can even be thrown together with other vegetable scraps such as onion, celery, carrot, mushroom stems, and herb steams like cilantro or parsley to make a delicious and nutritious broth.

Basic White Beans

1Lb. dried white beans (great northern, cannellini, navy, zolfino for example)

10 cups of water (or broth as mentioned above)

1 bay leaf

3 cloves of garlic peeled and smashed (more if desired)

1 Tbs olive oil

Cheese rind

Heavy pot or slow cooker


  1. Wash beans and place in pot with water, bay, garlic, and oil.
  2. Bring to the boil over high heat. Once at a boil turn to low heat
  3. Simmer 30-60 min or until beans start to soften then add cheese rind and continue to simmer until fully cooked
  4. Drain if desired and season with salt and pepper to taste.

Tips:

Do not add salt or use salted stock/broth at the beginning of the cooking process so that the beans cook quickly and evenly.

Any fresh or dried herbs can be added to the cooking process as desired.

Once cooked beans can be eaten as is or added to soup, pureed into a dip, topped on pizza, mixed into pasta, tossed into salad, or pared with rice.

Dried beans are versatile, healthy and cheap!

Fish Stock

How to get the most out of your food and reduce waste.

If you ever take a Saturday morning trip over to the Tuna Harbor Dockside Market at the Port of San Diego you will see a dazzling array of seafood for sale direct from the fishermen who just caught it. While you can get a whole fish at a fraction of the cost of the grocery store it can be a bit daunting to purchase. What do you do with a whole fish? There is a butchering station there that will cut it up for you but don’t waste those heads! Make your money go even farther by cooking up some fish fumet that can be used to make healthy and delicious soups and pastas. Use it in chowders, bisques, cioppino, miso, even as a warm cup of “bone broth”.

Fish Fumet

1 Fish head (I used Opah) and bones if desired

1 large onion, small dice

2 carrots, small dice

3 celery stalks, small dice

2 Tbs butter or olive oil

2 bay leaves

2 Tbs peppercorns

6 sprigs thyme (or ½ tsp dried)

1 bunch parsley or cilantro stems

¼ Cup dry white wine or lemon juice

Aprox. 2 quarts cold water or enough to cover bones

Large pot

  1. Wash head and bones well and set aside
  2. Melt butter in large stockpot over medium heat and add onion, carrot, celery, bay, peppercorns, thyme and parsley, stirring often until vegetables become soft but not brown.
  3. Place fish head and bones in pot. Cover pot and let cook about 10 minutes or until bones have turned white
  4. Add wine or lemon juice then cover with water and let simmer on low heat approximately 30 minutes.
  5. Strain through a cheesecloth set inside a fine mesh strainer and cool over an ice bath if not using immediately.
  6. Once cool refrigerate for up to 3 days or freeze up to 2 months. Like all homemade stock it will have a jellied consistence when cool but will melt when reheated.

Tips:

Great way to use up vegetable trimmings as well. Feel free to add other vegetables such as mushrooms, leek, garlic, fennel but avoid strong flavors like broccoli, asparagus or bitter greens.

Oily fish such as salmon, tuna, or mackerel have a strong flavor and will make a stock right for their own chowders but will be too strong for other applications.

Easy stocks can also be made using crustacean shells like shrimp or crab.

Get to Know Local Farmer Stepheni Norton, founder of Dickinson Farm

Slow Food Urban San Diego Board Farm Liaison, Stephanie Parker, recently interviewed Stepheni Norton, the owner of the local Dickinson Farm to learn more about how and why she farms. Before becoming a farmer Norton had a distinguished and decorated career as Chief Yeoman in the US Coast Guard.  Learn more about Norton's journey to becoming a farmer in her own words. Why do you farm?  It really started as a personal necessity and as my health improved has become a respite, a mission and as my husband says, a calling.

Tell us about Dickinson Farm's beginnings.   A year-round heirloom fruit, vegetable & herb farm in National City, California…that all started because of a bug the size of a pinhead.

My husband Mike & I purchased the Wallace D. Dickinson homestead in February  2012, as our “forever” home. When we first started dating we half-jokingly made a list of everything we wanted in a home …it was really a delusional list….6 bedrooms, actual land (not a postage stamp), architecture and character, room for a 7 car garage and of course a view of the ocean, and must be in SoCal. It was certainly not something we expected to find.  Then we did, insomnia and the end of the internet, I found the house.  We saw it the next day and put an offer in right away.

When we bought the property, I was in the mist of pre-deployment work-up preparing for a 10 month OCONUS deployment – a few weeks later I was bit by a tick on San Clemente Island off the coast of South California. Unfortunately, Southern California Doctors are not Lyme literate, so I was left sick and untreated for the rest of work-ups and a 10-month deployment.

Almost a year later I returned home, I was still very ill and was bounced around from Doctor to Doctor to find a cure.  After 2.5 years of fighting an undiagnosed illness and looking for a Doctor, in July, 2014 I was diagnosed with Lyme disease and related co-inflections.

Right away I started daily IV treatment and my Doctor wanted me to eat as fresh and healthy as possible.  Each day after treatment Mike would drive me home and try find fresh organic food to make for dinner.

This is when they noticed fresh produce was hard to come by in National City.

So I asked my  Doctor if I could be outside and garden a little… with no real farming experience we planted a few fruits trees. Then we got advice from  a few different garden consultants and started planting a small garden patch …and with that the Farm began.

In the SoCal sunshine, the crops spouted up with ease providing excess in abundance of what they could eat. We started giving away the excess to friends, family and even a crop share. Then decided to give the excess to Dreams for Change to help feed those that couldn’t afford to buy their own.

All the while I sat in the IV chair researching how to make the Farm an actual business.

By January 2016, the few trees and garden patch became 16 raised boxes, orchard, hop patch 20 in ground rows, 4 coffee rows; 1/4 of an acre total. Plans were set and licenses obtained – and in January 2016 the little garden patch officially became Dickinson Farm.

How many varieties do you grow?  Currently we have 42 crops and 108 varietals.  We used fall 2015 and spring / summer 2016 to determined what grows best on our plot.  Starting with our Fall 2016 planting we will reduce the varietals to 2 per crop, focusing on growing what does best on our land which still providing options to our customers.

What made you decide to grow all heirloom varietals?  When we purchased the property, I spent a great deal of time researching the properties history.  We found that Wallace D. Dickinson in addition to being a savvy business man, was one of the top local hobby horticulturists.  He spoke a lot about how to grow a kitchen garden in a [early 1900] “urban environment”.  We wanted to be true to the property and land, what would have Wallace grown? That notion started us down the heirloom path, and the taste and quality of the produce kept us there.

Where do you find your seeds?  I never expected finding real heirloom seeds to take the amount of research it does, but after many hours and some duds, we stick with a few companies we trust… Baker Creek, Southern Exposure Seed Exchange, Annie's Heirloom, Wood Prairie, & Sherck's.

What's been the biggest thing you've learned during this process?   You cannot control growth.  You are most likely going to be both elated and disappointed every day.  I am a data junkie and logical person. That works with lots of aspects of planning and farming…until the weather changes and the wind comes in.  Then all bets are off.

What's been easy?  Really once you let go of perfection, it’s all easy.  I’ve had a more than a few mentors who taught me hard are the days you or your shipmates do not get to come home. Everything else is just a little heavy lifting and another day in paradise.

Anything you're loving right now that you could share a recipe for?  Carrot tops! Seriously why do people throw these away? (FYI I do recipes like my G-Ma…measurements are swagged)

Carrot Top Pesto Few cups washed carrot tops Few basil leaves (1 leaf to each cup of carrot tops) Small handful whatever nut you like, toasted – we use black walnuts as an homage to our family land in Southern Illinois. Handful grated aged Parmesan cheese One garlic clove or more (I use more) flaky sea salt extra-virgin olive oil to consistency

Blend in mini-chop or get an arm work out with mortar and pestle

Put on Burrata, grab a baguette … amazing

How can people support the farm?  Shop Small & Shop Local!  We are a small farm,  and we want people to be able to choose what they like.  We so offer a free choice of in season, harvested to order fruits, vegetables & herbs in any quantity or combination you choose. It’s a “design your own” box – and is perfect for specialty diets & picky eaters.

Each Thursday evening, we send out a Harvest alert with what will be ready for harvest Monday. Friday morning at 7:00AM our on-line store opens and customers can pre-order online until 7:00AM Monday. Orders are harvested Monday mid-morning, ready for The Market Monday evening at 7:00PM

Every Monday (except holidays) from 7:00pm-9:00pm we bring pre-orders and the remaining harvest to Machete Beer House (aka "The Market")

The Market @ Machete Beer House 2325 Highland Ave National City, CA 7:00pm-9:00pm

Thanks so much to Stepheni Norton for sharing your story with us!

Seafood Saturdays

13230112_10154229939483824_7682329547428895334_n We'll restart our seafood Saturdays tastings in 2017! Stay tuned!

Join SFUSD, Chef Cindy and local fishermen Saturdays from 9-11am at Tuna Harbor Dockside Market to learn about San Diego's local seafood, how to cook it, what it tastes like, where it was caught, and who caught it. Check out our Facebook page to see which Saturdays we'll be there and what's cooking.

Chef Cindy's user-friendly recipes are always delicious and fun. Plus, local fishermen share how they caught the bounty and they might tell you their favorite ways to cook it. If you love seafood or don't know what to do with it, this is for you.

Guest chefs and volunteers wanted. Meet fishermen, learn about local seafood, taste yummy dishes. email: Sarah@slowfoodurbansandiego.org

 IMG_2351Sheephead Recipes
Basic Recipe – Sheephead Salad
1-1/2 lb  Sheephead fillets, skin-on
¼ cup  Celery, diced
¼ cup  Red onion, diced
¼ cup Parsley, minced

To taste  Lime juice, salt and fresh-ground black pepperSteam fillets until just cooked (145 degrees), wrap and refrigerate. Chill completely, at least 2 hours. Flake the flesh off the skin, into a large bowl. Mix with celery, red onion, parsley and lime juice to taste. Continue with one of the preceeding recipes.

Sheephead Louie

Think the “king of salads” aka Crab Louie, a California favorite going back to the early 1900s!

1 lb  Sheephead Salad (basic recipe, above)
4  Eggs, hard-cooked, diced, sliced or wedged
¾ lb Heirloom cherry tomatoes, halved or quartered
¾ lb Asparagus, par-cooked, bias-cut
12oz Crunchy lettuce, like iceberg, chopped, or hearts of romaine, cut crosswise ½” thick
1 cup Louie*, Thousand Island or Green Goddess dressing

Arrange lettuce on chilled plate. Top with sheephead salad. Garnish with egg, tomato and asparagus. Serve with your favorite dressing. Variations: Use avocado instead of asparagus. Add kalamata or other olives, pitted. Add cucumber and/or radishes, thinly sliced. Sub shredded brussel sprouts for the lettuce.

Louie Dressing

Traditionally a mayo-chili sauce blend, Evening Land president and sommelier Larry Stone kicks it up a few notches with this version.

1 cup mayonnaise 3 tablespoons ketchup 1 tablespoon sweet pickle relish 1 tablespoon fresh lemon juice 1 garlic clove, minced 1 teaspoon Tabasco 1/2 teaspoon Worcestershire sauce 1/4 teaspoon sweet smoked paprika 1/4 teaspoon chili powder Salt and freshly ground pepper

In a bowl, whisk the mayonnaise with ketchup, relish, lemon juice, garlic, Tabasco, Worcestershire, paprika and chili powder; season with salt and pepper. Let stand at room temperature for 15 minutes.

Online at http://www.foodandwine.com/recipes/crab-louie

Sheephead Cocktail
1 lb              Sheephead Salad (basic recipe, below)
¼ cup          Carrot, finely diced
1 Tbs           Capers, tiny, drained
1 tsp           Jalapeño, ribs and seeds removed, finely minced
¼ cup          Olive oil, high quality, extra-virgin
3 Tbs           Lemon juice, fresh (from 1 large lemon)To taste
Salt and fresh-ground black pepper

Optional  Seafood Cocktail Sauce Combine sheephead salad with carrot, capers, jalapeno, olive oil and lemon juice in a large bowl. Gently fold ingredients together, being careful not to break up the fish too much. Taste and adjust seasoning, adding salt and pepper if needed. Serve immediately, or chill up to 6 hours. Divide mixture between 8 wine glasses. Optionally serve with your favorite seafood cocktail sauce. Inspired by a recipe from Sheila Lukins of Silver Palate Cookbook fame.

IMG_2340
IMG_2345 IMG_2342 IMG_2340 IMG_2339

Infused Peach Butter

by Rachel HelmerSFUSD Board Member

peaches

The delicious fruits of spring and summer are popping up everywhere. Overflowing in grocery store bins, scattering tables at farmers markets, and if you are lucky, hanging heavily from the branches of trees in your yard. Peaches are one of my favorites and their season seems so short that I like to capture all that sweet summer stone fruit deliciousness and preserve it to be enjoyed well past the sunshiny season. This recipe for peach preserve can be infused with anything you fancy! A few of my favorites are vanilla bean and lemongrass. Try one, or both and enjoy this peachy sweet preserve on yogurt, waffles, and muffins or incorporated into salad dressings and sauces all year long!

Infused Peach Butter

Ingredients Approximately 6 lbs of peaches (or nectarines if you prefer) 3 cups sugar 4 lemongrass stalks, smashed and cut into chunks 2 vanilla beans, split open lengthwise and cut in half ½ cup water 3 tablespoons lemon juice

Making the butter First you need to remove the skins from the peaches. To do this fill your largest pot 2/3 full with water and bring to a boil. While you are waiting for this to boil prepare an ice bath in a large bowl, again filling only 2/3 full with water. Once the pot of water is boiling plop as many peaches as you can fit into the bubbling pot and allow to simmer for 1 minute. Using a slotted spoon remove the peaches and add them immediately to the ice bath to cool for 2 minutes. Once the peaches have cooled you can easily remove their skins, just give the skin a pinch and it should peel off.

If you were unable to boil all of your peaches in the first batch repeat the process until all of your peaches have been simmered and skinned. Using your hands or a knife slice open the peach and remove the pit, cut away any bad spots on the fruit, slice the peach into a few different pieces and place the meat of the peach into a large bowl.

Add to this the sugar, gently combine and then cover the bowl to let the peaches sit and get nice and juicy for 1 ½ to 2 hours.

After a few hours have passed, strain the juice from the peaches into a large pot. Add to this your lemongrass chunks, vanilla bean, and water and bring to a boil. Reduce the heat, cover, and let simmer on low for 3o to 40 minutes or until the mixture thickens slightly. Turn off the heat and using a slotted spoon or a strainer remove the lemongrass from the syrup. Now you are ready to puree everything together. Using your blending machine of choice (vita mixer, blender, or if you have one an immersion blender right in the pot) blend the peaches and the syrup together until smooth.

Add this mixture and the lemon juice back to the pot (if it’s not already there). Stir and taste test, add more lemon juice and sugar if you like, and then cook on medium low until the mixture thickens to the consistency of baby food, about 30 to 40 minutes. If you don’t want to mess with the canning process you can store the peachy butter in containers and pop it in the refrigerator, just make sure you consume it within a few weeks. Otherwise you can proceed with your preferred method of canning and enjoy the peachy goodness all year long!

Seafood Saturdays!

THDM-Seafood-Saturdays-4-23-v2

Chef Cindy Quinonez will cook Sweet and Sour Rockfish with Bok Choy and Opah Meatballs (recipe below) this Saturday. 

opah

Opah Lampris guttatus (aka moonfish). Opah is a bycatch fish in the tuna and swordfish fisheries off California and around the Pacific Islands.  They are available year round, but landings seem to peak from April through August. In 2015, San Diego scientists discovered that opah are warm-blooded fish.

For more information on opah go here. 

Lettuce-Wrapped Spicy Opah Meatballs

Spicy meatballs made from ground opah, served on lettuce or other greens with a lime dipping sauce. Variation of recipe of same name from Pacific Flavors by Hugh Carpenter.

Spicy Opah Meatballs: 1 pound ground opah 2 green onions, minced 2 tablespoons minced fresh coriander 2 tablespoons light soy sauce 1 egg 1 teaspoon grated orange rind 3/4 teaspoon grated nutmeg 1/2 teaspoon Chinese chili oil 1/2 teaspoon black pepper 4 cloves garlic, finely minced 1 tablespoons fresh ginger, minced Cornstarch for dusting

Spicy Lime Dipping Sauce:

2 tablespoons Thai fish sauce 2 tablespoons lime juice 2 teaspoons sugar 1/2 teaspoon Chinese chili oil 1 clove garlic, finely minced 1 head Bibb lettuce or other greens* 1 bunch fresh cilantro 20 mint leaves 1/2 cup peanut oil * Baby bok choy leaves, kale, chard, spinach, etc.

Preparation: In a bowl, combine ground opah, green onions, coriander, soy sauce, egg, orange peel, nutmeg, chili sauce, pepper, garlic, and ginger. Mix thoroughly, then rub a little oil on your hands and form 20 meatballs about 1 inch in diameter. Arrange on a lightly oiled plate and refrigerate until ready to cook.

Pull leaves from Bibb lettuce or other greens and cut into 20 pieces about 3 inches square. On each lettuce square, place a sprig of cilantro and 1 mint leaf. Arrange lettuce leaves on a serving platter and refrigerate until ready to serve.

Cooking: To broil meatballs, preheat oven to 550 degrees. Place the meatballs on a small baking sheet. Turn oven to broil, place the baking sheet about 4 inches from heat, and broil meatballs until no longer pink in center, about 3 to 4 minutes. To pan-fry meatballs lightly dust with cornstarch. Place a 12-inch skillet over medium-high heat. When frying pan is hot, add oil. When oil just begins to give off a wisp of smoke, add meatballs and pan-fry them, turning them over in the oil until golden brown and no longer pink in the center, about 4 minutes.

Place meatballs next to lettuce cups on the serving platter. Serve at once, accompanied by the dipping sauce. Each person wraps a lettuce cup around a meatball and dips one end of the package into the sauce.

In a small bowl combine dipping sauce ingredients. Add 2 1/2 tablespoons water and refrigerate. Serves 6 to 8 as an appetizer; 2 as an entree.

The New Edible San Diego for Kids is Here!

ESD-Kids-web-page-masthead

Slow Food Urban San Diego is excited to announce the arrival of the Winter 2015/6 issue of Edible San Diego for Kids. This issue is all about dairy and meat. It features articles written by and for San Diego kids, a delicious recipe and a gardening activity.

This issue is appropriate for 4th through 6th grade independent readers. It may also be worked into lesson plans for younger students or sent home for reading with their families.

Edible San Diego for Kids is produced by Slow Food Urban San Diego's Education Committee in collaboration with Edible San Diego.

If you are interested in having copies delivered to your school, please email LisaJoy@slowfoodurbansandiego.org

Kale, Sausage, and Sweet Potato Soup

By Lisa Churchville, SFUSD Member

kale-soupI love a good bowl of soup. I like it steaming hot and full of goodies. I want the soup to delight my taste buds and fill my belly. This hearty soup has a smoky background, with a touch of heat and a touch of sweet.

What you’ll need to serve six people:

  • 1 onion, halved then sliced thin
  • 1 pound ground sirloin
  • 4 cloves of garlic minced or 1 teaspoon garlic powder
  • 1 14 oz can diced fire roasted tomatoes
  • 4 cups chicken broth
  • 1 teaspoon oregano
  • ½ teaspoon smoked paprika
  • 1 teaspoon salt
  • 2 cups peeled, diced sweet potatoes (2-3 small potatoes)
  • 1 bunch green kale, torn off stem into pieces
  • 2 or 3 hot Italian sausages, cooked (It’s important to use fully cooked sausage. You want the sausage to be spicy. If it isn’t fully cooked, the spiciness will drain into the broth and the sausage will taste just like the ground meat.)

Directions:

Drizzle some oil into a big soup pot. Drop in the onion and sauté until soft. Add the ground meat and garlic, and sprinkle in some salt and pepper. Break up the meat while it’s browning. Once the meat is cooked through, add the diced tomatoes with juice, chicken broth, sweet potato, oregano, paprika, and salt. Bring to a boil. Add the kale.

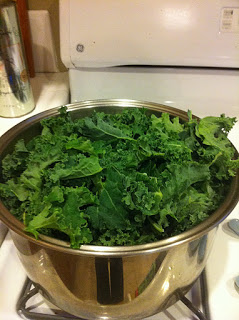
I know this looks like A LOT

raw-kale


but it cooks down to this.

cooked-kale

Cover the pot and lower to a simmer for 15-20 minutes until a fork can go through the sweet potato. Add sliced hot Italian sausage and simmer another 5-10 minutes until it's heated through.

What's YOUR favorite autumn recipe? Share it with us on Facebook!


Julia Child's Beef Bourguignon ~ Boeuf a la Bourguignonne

Ingredients

1/2 pound bacon, chopped 1 tablespoon olive oil 3 pounds lean stewing beef (cut into 2" chunks) 2 carrots, sliced 1 onion, chopped 1 teaspoon salt 1/4 teaspoon pepper 3 cups full-bodied red wine 2 - 3 cups beef stock 1 tablespoon tomato paste 2 cloves garlic, smashed 5 - 8 twigs of fresh thyme 1 bay leaf 2 tablespoons flour and 2 tablespoons butter, mashed together (for thickening the sauce at the end)

For the brown-braised onions 1/2 bag frozen white pearl onions, defrosted and patted dry 1 1/2 tablespoons butter 1 tablespoon olive oil 1/2 cup beef stock or beef broth Salt and pepper 5 sprigs of thyme 5 sprigs parsley

For the sautéed mushrooms 1 pound mushrooms, quartered 3 tablespoons butter 1 tablespoon olive oil Salt and pepper

Directions

Gather and prep your ingredients prior to cooking. Chop the bacon, chop the beef (or have the butcher do this for you to save time!), chop the veggies, smash the garlic, wash your herbs, uncork the wine. Having all your ingredients ready to go will help the preparation run smoothly.

Preheat your oven to 325 degrees.

Start by thoroughly patting the beef dry using paper towels. Damp beef will not brown properly but rather steam and turn an icky shade of gray when cooked.

In a large dutch oven pot, heat the olive oil over medium heat. Add to this your bacon and cook for several minutes, until the bacon is browned and has released most of its fat. Use a slotted spoon to remove the bacon, leaving the fat in the pan.

Over medium-high heat, brown the beef in the bacon fat for one or two minutes on each side. Do not overcrowd the pan. The beef should quickly develop a nice caramelized brown on the surface. Turn the beef to brown on all sides, then remove with a slotted spoon and set aside. Repeat until all of the beef has been browned. If your meat is not browning properly the pan is either over crowded, not hot enough, or your meat is too damp. Use caution when browning the meat as the hot fat tends to spatter at times.

Once all of the beef is browned, lower the heat to medium and add the carrots and onions to the hot pan. Cook for five minutes or until they develop a golden brown color. Then, carefully pour out the excess bacon drippings, leaving the veggies in the pan.

Add the beef and bacon back into the pot. Add to that the tomato paste, thyme, garlic, bay leaf, wine and beef broth. Stir to combine. Cover and place back in the oven to cook for 3 to 3 and ½ hours.

While the beef is cooking, prepare the onions and mushrooms

For the onions:

Heat the butter and oil in a skillet over medium heat. Add the onions and cook for about 10 minutes, occasionally shaking the pan to allow the onions to roll around in the pan and brown on all sides. Add to the onions the beef stock and fresh herbs. Allow to come to a simmer, lower the heat, cover and simmer slowly for about 20 - 30 minutes. Check the pan towards the end of the cooking time. Most of the liquid should have evaporated and formed a brown glaze around the onions. Season with salt and pepper, remove the herbs, then set aside.

For the mushrooms:

Heat the butter and oil in a sauté pan over medium-high heat. When the foam from the butter begins to subside (an indication that the butter is hot enough according to Julia) add the mushrooms and cook for about 5 to 10 minutes, stirring frequently. Season with salt and pepper, remove from heat and set aside.

Once the beef has finished cooking remove from the oven. Run the stew through a strainer separating the meat, herbs and veggies from the liquid sauce. Place the meat back in the pot, you don't need to add the veggies and herbs but if some get mixed in that's okay it will just add texture to the stew. Place the separated sauce in a pan and allow to rest for a few minutes. Excess fat with rise to the surface, use a spoon to collect and discard about half to three fourths of the fat. You should be left with 2 to 3 cups of sauce. Season to taste with salt and pepper. Add to the sauce the mashed butter and flour mixture and stir with a wire whisk over medium heat, bring to a simmer and stir until slightly thickened and smooth.

Now you are ready to combine all the ingredients, add to the meat in the pot the thickened sauce, brown-braised onions and sautéed mushrooms. Warm over medium heat and stir to combine all the ingredients.

Beef Bourguignon can be served over buttered noodles, mashed potatoes or simply with a sliced baguette.

You tube of Julia Child making Boeuf Bourguignon

Edible San Diego for Kids Issue #3

ESD-Kids-web-page-masthead-e1431105410751.jpg

_ESD-Kids-web-page-masthead

Slow Food Urban San Diego is excited to announce the arrival of the Spring 2015 issue of Edible San Diego for Kids. This issue is all about seafood. It features articles written by San Diego kids and a delicious seafood recipe that kids can help make at home. There's also a gardening activity (hint: what squiggly crawlers help soil to stay healthy?). This issue is a bit more advanced that our first two, so we recommend it for 4th through 6th grade students.

Edible San Diego for Kids is produced by Slow Food Urban San Diego's Education Committee in collaboration with Edible San Diego. If you are interested in having copies delivered to your school, please email christina@slowfoodurbansandiego.org by April 20th.

This issue was made possible by the generosity of Chipotle!

Holiday Deliciousness from Chef Jenn

Baked Spiced Pumpkin Pudding

Serves 6 to 8 Pudding

  • 1 ¾ cups Pumpkin puree*
  • ½ cup Granulated sugar
  • ¼ tsp Vietnamese cinnamon
  • 1/8 tsp Kosher salt
  • ¼ tsp Ground ginger
  • 1/8 tsp Freshly grated nutmeg
  • 1/8 tsp Ground clove
  • 1 cup Whole milk
  • ½ cup Heavy cream
  • 2 large Eggs, lightly beaten
  • 3 large Egg yolks

Whipped Cream

  • ½ cup Chilled whipping cream
  • 1 ½ tbsp Sugar
  • ½ tsp Vietnamese cinnamon

Preheat oven to 350° Combine pumpkin, sugar, salt and spices in a food processor and blend for 30 seconds. Transfer to a double boiler. Cook for another 10 to 15 minutes, stirring frequently. The mixture will thicken and get a bit darker. Remove the bowl from the double boiler. In a separate bowl whisk together whole eggs, egg yolk, milk and heavy cream; slowly whisk in one cup of the warm pumpkin mixture to temper the eggs. Then with an electric mixer (or food processor) combine egg and milk mixture into the pumpkin puree.

Pour into ovenproof 6-ounce pudding cups or ramekins and place onto a baking sheet. Bake for 35 to 40 minutes, until puddings barely jiggle when shimmied and/or a knife tip inserted into the center of puddings comes out clean.

While they bake, combine whipping cream, sugar and cinnamon in the bowl of an electric mixer. Whip until peaks just begin to form.

When the puddings are cooked through, transfer to a cooling rack on the counter, then cool completely at room temperature, about 1 to 2 hours. Chill until ready to serve. Serve with gingersnap cookie.

Pumpkin Puree

Makes 2 to 2 ½ pounds

  • 1 (4 to 6 lb) Pumpkin
  • Kosher salt

Heat the oven to 400 degrees F.

Boil (or microwave) the pumpkin for 10 minutes (till just soft enough that you can easily indent the skin with your finger). Cut off the stem and cut in half. Scoop out the seeds and fiber with a large metal spoon or ice cream scoop (reserve seeds for another use). Cut into 8 wedges and sprinkle the flesh with kosher salt; lay flesh side down, on a parchment paper-lined half sheet pan. Roast until a paring knife can be easily inserted and removed from the pumpkin, 30 to 45 minutes. Test in several places to ensure doneness. Remove the half sheet pan to a cooling rack and cool the pumpkin for 1 hour. Using a large spoon, remove the roasted flesh of the pumpkin from the skin to the bowl of a food processor. Process until the flesh is smooth, 3 to 4 minutes. Store in the fridge for up to 1 week or freeze for up to 3 months.

For more delicious recipes and classes visit Chef Jenn's website! 

Apple Days are here!

Apple season is here, hurrah!! Like many people we are super excited for all things appley. Apple picking, hot apple cider (once this weather cools down!) and of course apple recipes!

A big THANK YOU to Chef Jenn for sharing this delicious recipe with us!

Apple Galette Serves 8 to 10

Galette Dough 1 ½ cups All-purpose flour ¼ cup Cornmeal ½ tsp Kosher salt 1 tbsp Sugar ½ cup + 2 tbsp Unsalted butter, cut into small pieces and chilled 4 to 5 tbsp Ice water 1 tsp Lemon juice

Filling

5 or 6 Apples, peeled and sliced (approximately 5 cups); I like a combinataion of Braeburns, Golden Delicous and Empire 3 tbsp Unsalted butter 1 tbsp Lemon juice ¼ cup Sugar ½ tsp Vanilla Extract Pinch Kosher salt 1 Egg yolk 1tbsp Water 2 tbsp Sugar

In a mixer, with the paddle attachment, combine flour, kosher salt, corn meal and sugar. Paddle to combine.

Add cold butter, all at once. Mix on low speed till the mixture resembles cornmeal with some large chunks. Using a fork, stir in lemon juice and 1 tablespoon of ice water at a time. After the fourth tablespoon test the dough. Squeeze dough in your hand, if the dough does not hold together or looks dry add the additional 1 tablespoon of water (or more if needed).

Turn out dough onto a piece of plastic wrap, gather together to form a disk. Wrap well in plastic wrap and refrigerate for at least 1 hour.

For the filling- in a sauté pan melt butter over medium low heat. Add apples and cook they start to become tender.

In a bowl combine apples, lemon juice, sugar, ginger, vanilla and salt.

Preheat oven to 400° F.

Line a cookie sheet with parchment paper.

On a lightly floured surface, roll out the dough into a 14 to 5 inch circle.

Transfer the dough to the parchment lined cookie sheet.

With a slotted spoon ladle the filling into the center of the dough, leaving a 2 inch dough boarder around the filling.

Fold the dough over the edge of the fruit filling, toward the center, pleating and overlapping as necessary. In a bowl stir together egg yolks and water. Brush onto the edges of the dough and sprinkle with 2 tablespoons sugar.

Bake for 45 to 50 minutes, or until golden brown.

Let rest for at least 10 minutes before serving.


For a full list of upcoming classes with Chef Jenn, including Vegan and Urban Farm classes go to http://www.chefjenncooks.com/


Summer Shelling Beans

Hip hip hurray!! Summer is here at last, what better way to welcome it in than by cooking up some scrumptious seasonal produce based fare. We are loving all the fabulous varieties of shelling beans that are just now starting to come into season. Decorated with polka dots, strips and vivid colors that range from green, yellow and black to purple, pink and red shelling beans are as much a sight for the eyes as they are a treat for the tummy. For your cooking pleasure we have gathered up a few of our favorite shelling bean recipes. Enjoy!

Delicious Fishes with Chef Jenn and Tommy Gnomes!

Last month our very own Slow Food Urban San Diego Education co-chair, the talented Chef Jenn Felmley teamed up with everyone's favorite fishmonger Tommy Gnomes of Catalina Offshore for one of their famous cooking classes at Great News Cooking School in Pacific Beach. Tommy graciously donated his teaching fee to Slow Food Urban San Diego (thank you Tommy!!) and as if that was not enough wonderfulness Chef Jenn and Tommy graciously decided to share one of the favorite recipes of the class with all our readers here on the blog. Enjoy!!

Baja Style Ceviche

Serves 4 to 6

Ingredients

  • 1 ½ lb          Firm fleshed white fish (rockfish, snapper, etc.), boneless and skinless
  • ¾ cup           Fresh squeezed lime juice
  • ½ cup           Fresh squeezed lemon juice
  • 1/3 cup        Beer (preferably a Mexican beer like Corona, Tecate or Dos Equis)
  •  1                  Jalapeno, seeded & diced
  • 1 cup           Green onion, sliced into thin slices
  • 1/4 cup        Cilantro leaves, chopped
  • 1 tbsp           Extra virgin olive oil
  • 1/4 cup        Tomato ketchup
  • ¼ cup           Clamato or tomato juice
  • ¼ cup           Lime juice
  • Salt & fresh ground black pepper
  • 1 1/3 cup     Cherry tomatoes (multi colored), halved or quartered
  • 1/2 cup        English Cucumber, finely diced
  •  Tortilla chips

Preparation

Cut the fish into ¼ inch dice and place into a shallow non-reactive dish.

Combine lemon juice, lime juice and beer; pour over fish (liquid should generously cover the fish or else you will need to stir the fish every 10 minutes).

Marinade the fish in the liquid, refrigerated, for about 30 minutes (or until the fish is no longer pink and raw looking when broken apart).

In a large bowl, stir together jalapenos, green onions, cilantro, olive oil, ketchup, Clamato juice and lime juice.

Drain fish from the marinade.

Gently fold tomatoes, cucumbers, and fish into jalapeno mixture. Season with salt and pepper.

Serve with saltine crackers, good quality corn tortilla chips or tostadas.

For the love of beets

Heart healthy beets are rich in betaine, a nutrient that is being studied for its cardiovascular benefits. What better way to treat your loved ones this valentines than with a sweet treat that packs a heart healthy boost! This video from husband and wife team Matt and Julie Walker of Tiger in a Jar made our produce loving hearts skip a beat and sent us running to the kitchen to whip up this healthier twist on the beloved red velvet cake.  

beet cake from tiger in a jar on Vimeo.

Sticky, Chewy, Messy, Gooey Recipe

The holidays are upon us. Often this time of year inspires weeks of personal reflection and heartfelt nostalgia while simultaneously evoking a need to scribble out a long list of resolutions. The top of my list for 2013? A juicing cleanse to kick off a healthy new year! But who am I kidding? Now is not the time to start said cleanse- there is still a whole week left in 2012 to indulge in sugar-toned gluttony and deep-fried tastiness!
Here is a recipe from Coronado-based author Jill O'Connor to get you through the holidays with a bit of chocolatey, liquor-laced cheer!

Grown-Up S'mores from Sticky, Chewy, Messy, Gooey by Jill O'Connor

Serves: Makes 15 S’mores


Ingredients:

For the chocolate filling: 8 large egg yolks 1-½ cups confectioners sugar sifted 2 tablespoons white crème de cacao 2 tablespoons Kahlua 2 teaspoons Cognac 1 teaspoon pure vanilla extract 1/8 teaspoon salt 1 cup (2 sticks) unsalted butter 2 tablespoons Dutch-Processed cocoa power 12 ounces semisweet or bittersweet chocolate, finely chopped 1 ½ cups heavy cream, whipped to soft peaks

For the marshmallow fluff meringue: 3 Large egg whites Pinch of Salt Pinch of cream of tartar ¼ teaspoon pure vanilla extract 1 cup of marshmallow fluff

For the graham cracker crust: 3 cups crushed graham cracker crumbs ½ cup (1stick) unsalted butter, melted 1 tablespoon granulated sugar


Directions:

Preheat the oven to 350°F.

To make the crust: Combine the graham cracker crumbs with the melted butter and granulated sugar until will combined.  Press into the bottom of a 9-by-13-inch metal baking pan.  Bake the crest until starts to brown and become crisp, about 10 minutes.  Transfer to a wire rack and let cool completely.

To make the filling: Using an electric mixer, beat the egg yolks and confectioners’ sugar together in a large bowl until they are thick and the color of butter.  Beat in the Cognac, crème de cacao, Kahlúa, vanilla, and salt.

Melt the butter in a medium saucepan over low heat and whisk in cocoa powder until smooth.  Remove the pan from the heat, add the chocolate, and stir until the chocolate is melted and the mixture is smooth.  Let cool slightly, then gradually beat into the egg mixture.

Fold the softly beaten heavy cream into the chocolate mixture just until combined.  Spoon the chocolate cream over the graham cracker curst, smoothing it evenly with a spatula.  Cover the pan with plastic wrap and refrigerate until very firm, at least 4 hours or up to overnight.

When ready to serve, make the meringue: Using an electric mixer set at low speed, beat the egg whites until foamy. Add the salt and cream of tartar and beat at medium speed until soft peaks form.  Beat in the vanilla.  Add the marshmallow Fluff to the egg whites a little at a time, beating constantly until stiff peaks form.

Carefully cut the S’mores into 15 large squares.  Place each S’mores on a dessert plate.  Top each with ½ cup of the meringue in a large dollop.  Use a small kitchen torch to carefully burnish the meringue until tipped with golden brown.  Serve immediately.

In Season: Olives

556814_10151356437273824_1017218092_n.jpg

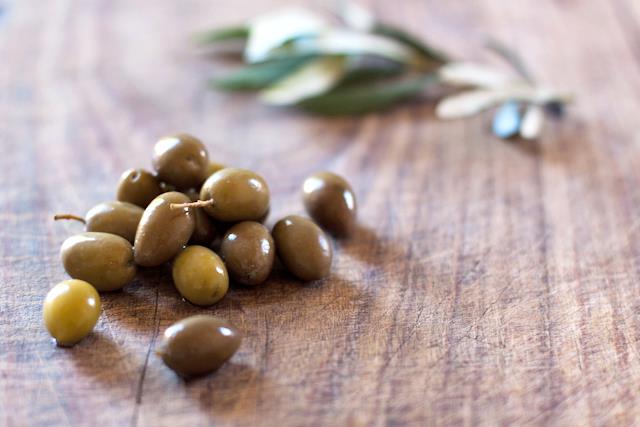
If you live in San Diego, chances are there's an olive tree or two growing in your neighborhood. In fact, the history of the olive industry in California starts in San Diego. The trees planted by Spanish Missionaries at Mission San Diego de Alcala at the turn of the 19th century provided the cuttings for most of the trees planted across the state and sold in nurseries across the country (ever heard of The Mission Olive?). Monoculture, overproduction and the olive fruit fly led to a decline in commercial production of olives in San Diego county, but many of the trees remain and some of them offer up beautiful, fruit-fly-free fruit that is perfect for curing at home.

When curing olives, you've got a few options.  You can ferment them as you would a kosher pickle in a process that takes up to year to complete or you can take a couple of shortcuts and start snacking in three weeks. The University of California Davis offers this extensive guide on olives and olive curing. Here are our favorite and tested methods from their guide for curing olives in 2 - 6 weeks.

MEDITERRANEAN-STYLE CRUSHED OLIVES

Use green-ripe fruit of any variety to prepare this style of olive. After these olives are cured and placed in the finish brine, you can also add a variety of seasonings, such as oregano, garlic, and lemon slices, to provide additional flavor.

Supplies needed

• Green-ripe olives • Pickling salt • White wine vinegar • Herbs, garlic, lemon, or other seasonings (optional) • Airtight, food-grade plastic, or glass containers (for olives) • 1-gallon container (for mixing brine)

Preparation

1. Sort the olives according to size, if desired, and discard any bruised or defective fruit.

2. Rinse the olives in water, and drain.

3. Place olives one or two at a time on a clean cutting board and strike with the flat side of a mallet or with a rolling pin. Crush each olive just to crack the flesh—do not break the pits or remove them.

4. Place the cracked olives into a food-grade plastic pail (or other container as listed above) and cover olives with fresh, cool water. Keep the olives submerged by placing a heavy plate or a sealed plastic food-storage bag filled with water over the fruit. Close the container lid loosely and leave the olives to soak.

5. After 24 hours, drain the olives and cover again with fresh, cool water. Repeat the water change daily for 6 to 7 days to reach the desired level of de-bittering. If you want less-bitter olives, continue to soak for a few more days and change water daily.

6. Prepare the finish brine—add 1 pound (11⁄2 cups) of pickling salt to 1 gallon of cool water, stir to dissolve, and add 2 cups of white wine vinegar. This amount of solution is enough to treat about 10 pounds of fresh olives.

7. Drain the de-bittered olives and cover with the finish brine. At this point you can add herbs or other seasonings if desired, such as chopped oregano, lemon slices, and garlic cloves. Close the container lid firmly and refrigerate. Note: These olives must be kept refrigerated. The olives are ready to eat after 4 days in the finish brine or you can allow the flavors to develop more fully during longer refrigerated storage.

8. These Mediterranean-style cracked olives can be stored in the refrigerator for up to 1 year in the finish brine.


DRY SALT-CURED OLIVES

Prepare dry salt cured olives from fully ripe, mature fruit that is dark red to black. Oil-rich varieties such as Mission are commonly used, but other varieties will also work. Use smaller olives; larger ones will soften too much during the process. Salting dehydrates the olive flesh, resulting in a soft, moist, shriveled product. Dry salt cured olives will be ready to eat about 5 to 6 weeks after you begin the salting process. These olives are salty and also slightly bitter because dry salt curing removes less oleuropein than other methods.

Dry salt cured olives can be stored for up to 6 months in a refrigerator, as described below, or they can be frozen for longer storage (see Methods for Preserving Cured Olives).

Supplies needed

• Mature, fully colored (dark red to purplish black) olives • Pickling salt • Slat wood box, wicker or plastic basket, or plastic bin (for olives) • Cheesecloth or nylon mesh • Airtight, food-grade plastic or glass containers (to store olives)

Preparation

1. Sort the olives and discard any bruised or defective fruit.

2. Prepare a large container that will hold the olives and salt. Use a slat wood box, a large wicker basket (it will likely stain), or a plastic bin with some drainage holes cut into the bottom. Line the bottom of the container with clean cheesecloth or nylon mesh. NOTE: Place the container outdoors (under cover) or over a large pan so the draining brine will not ruin your floors. Raise the container on small blocks to improve air circulation around the bottom.

3. Weigh the sorted olives and place them into the container. Add about 1 pound (11⁄2 cups) of pickling salt for every 2 pounds of olives. Mix the salt and olives very thoroughly in the container to distribute the salt and prevent mold from developing. Pour a 1-inch layer of additional pickling salt over the olives. Cover the container with clean cheesecloth and let it stand at about 60° to 80°F.

4. After 1 week, re-mix the salted olives by pouring them into a clean pail and then back into the first container. Add a small layer of salt over the top of the olives. Cover the container with a clean cloth and let it stand.

5. Repeat the mixing process once a week for the next month, until the olives are cured and edible.

6. When the olives are ready, pour them over a coarse screen to sift out any remaining salt. Allow the olives to dry overnight at room temperature.

7. Before storing the olives, add 1 pound (11⁄2 cups) of pickling salt to each 10 pounds of cured olives. Mix the olives and salt thoroughly and pack them into airtight containers (to minimize surface yeast and mold growth). Store in a cool place and use within 1 month, or refrigerate for up to 6 months, or store in a home freezer for up to a year. (Olives tend to become rancid if stored longer.) You can use these olives, as is, for cooking. For eating out-of-hand, you can first dip the olives briefly into boiling water to remove salt, allow them to air dry, and then rub them with a little olive oil and add herbs, such as rosemary, before serving.

WHERE TO FIND OLIVES IN SAN DIEGO?

If you don't have a tree in the neighborhood, you can find fresh olives at Specialty Produce and some smaller markets with extensive produce selections (We've heard they've been spotted at North Park Produce...)

WANT TO GROW YOUR OWN?

Check out this video on planting olive trees from Peaceful Valley.


Those funny persimmons...

They are pumpkin orange, tomato round, and berry sweet. They are a mystery to many but once a slice of this unique fruit is picked off a plate at the farmer's market and the tongue gets a taste of that subtly sweet flesh, there is no turning back: every fall you will look for those little globes of deliciousness gracing your favorite orchard's table. You can add persimmons to that must-have list of other unique fruits like pomegranates and Asian pears (which are also in season right now).

So what to do with your bounty? If they make it home without you ravenously snacking on your stash, here's a great salad from Epicurious.com to add a little healthy and locally sourced holiday cheer to your Thanksgiving table:

Rainbow Chopped Salad

Dressing:

  • 1/4 cup red wine vinegar
  • 1 1/2 tablespoons finely chopped shallot
  • 1/2 tablespoon honey
  • 1/4 cup hazelnut oil or extra-virgin olive oil

Salad:

  • 6 cups chopped romaine hearts
  • 4 cups sliced red cabbage
  • 1 large Fuji apple, halved, cored, diced
  • 1 Asian pear, halved, cored, diced
  • 2 Fuyu persimmons, peeled, seeded, diced
  • 3/4 cup hazelnuts, toasted, husked, coarsely chopped
  • 1/2 cup pomegranate seeds
  • 1/2 cup crumbled blue cheese (optional)

Dressing: Whisk vinegar, shallot, and honey in small bowl to blend. Gradually whisk in oil. Season dressing to taste with salt and freshly ground black pepper.

Salad: Combine romaine and next 6 ingredients in very large bowl; toss to blend. Add dressing and toss to coat.

Divide salad among plates. Sprinkle with blue cheese, if desired, and serve.

Happy Thanksgiving!

Read More http://www.epicurious.com/recipes/food/views/Rainbow-Chopped-Salad-363733#ixzz2Cq4BuSCh

Pumpkin Padron Bisque

pumpkin-bisque.jpg

In celebration of Food Day (Week), Alchemy's Chef Ricardo Heredia made a guest appearance at the Seeds@City Urban Farm stand last Thursday to give a scrumptious cooking demonstration in true Autumn spirit. Scoops of roasted pumpkin, charred Padron peppers, and silky cream filled his bubbling cauldron (stockpot) luring hungry students with the mouthwatering aroma.

A simplified version of the bisque served at Alchemy, he charred the peppers with a blowtorch ("Every poor college kid should have one!" he quipped), threw organic canned pumpkin into his Vitamix, and blended the produce with a generous dollop of heavy cream. Topped with smoked paprika oil and pepitas, students and faculty at City College raved over the free samples and beelined towards the farm stand to buy up the Padrons.

Thanks Chef Ricardo for reaching out to the community! It's people like you who make Food Day exciting, informative, and delicious!

Here's his recipe:

Pumpkin-Padron Bisque

Yield 4 qts

  • 3 ea. charred med. *Padron peppers *
  • 4 ea. cloves of garlic
  • 2 tablespoons olive oil
  • 1/2 ea. yellow onion
  • 2 lbs. cooked pumpkin
  • 1 cups sour cream
  • 1 quarts heavy cream
  • 2 tablespoons salt

Method

Rough chop the onion and toss with olive oil cook in oven broiler along with the Padrons and garlic until charred and caramelized. Remove the seeds from the Padrons but leave the charred skin on. Puree all ingredients intermittently with one quart of the cream heated. Garnish with toasted pumpkin seeds and smoked paprika oil.

Paprika Oil

  • 1 cup pimenton (smoked paprika)
  • 4 cups rice oil ( or any oil of your choice)

Method

Put pimenton along with one cup of oil in a sauce pan. Cook on medium heat for two minutes stirring frequently until it begins to darken and give off a toasted aroma. Add remaining oil and cook on low heat until it starts to simmer. Remove from heat and let sit until cool approx. 1 hour. Strain through a fine mesh sieve.

** Substitute your pepper of choice**

To make vegan omit the cream and sour cream and use vegetable stock

One person's junk...

IMG_3329.jpg

Is another person's treasure! You've heard that one before as you browsed through a particularly fruitful garage sale. A perfectly good bread machine? A ceramic bust of Mozart? A slightly rusty but still totally usable push lawn-mower? What were these sellers thinking? Of course you'll take it all off their hands...

The same thing happens in the garden. Some of us see weeds, others culinary delights. Where I work at Seeds@City Urban Farm we have our fair share of delicious volunteer plants like dandelions, amaranth, lambs quarters, stinging nettle, and purslane. Some was sown on purpose long ago, some just shows up. Instead of pulling it all and throwing it in the compost pile, we share the nutritional value and delicious uses with our community through the CSA program and farm stand. If you don't have your own garden to weed (and eat from), ask at the local farmers' markets for some of those tasty greens.

Here's a great article from the New York Times about a few of our favorites.

In Season: Prickly Pear or Opuntia

All this hot weather, and our canyons are overflowing with vibrant cactus fruit. Slow Food Urban San Diego urges you not not let let this fruit's vengeful exterior scare you for beneath its prickly shell and among its many seeds lies a cucumber-citrus nectar worthy of your best cocktail and culinary creations. Read below for Prickly Pear Recipes from chef Ricardo Heredia of Alchemy Restaurant and the Mixologists at SnakeOil Cocktail Company.

Squash Blossom Tamales Wrapped in Swiss Chard w/Prickly Pear Sauce Courtesy of Ricardo Heredia of Alchemy Restaurant

Yield 12 Tamales

Masa for Tamales :

  • 1 cup solid vegetable shortening
  • 1 Tbs. sea salt
  • 1 Tbs. ancho chili powder
  • 2 tsp. baking powder
  • 3 ½ cups masa harina for tamales
  •  2 ¼ cups warm water or vegetable stock.

Method

Beat shortening, salt, chile powder and baking powder with heavy-duty mixer on medium speed until fluffy, about 3 minutes. Turn mixer to low, and add masa a little at a time. Turn speed to high, and beat 3 minutes more, stopping to scrape down sides of bowl. Turn mixer off and add 1 1/4 cups water or stock. Turn speed to low, and slowly mix ingredients. Increase speed, and beat masa mixture at least 3 minutes more. Turn mixer off, and add remaining 1 cup water. Slowly increase mixer speed, stopping to scrape down sides of bowl, and beat 3 more minutes, adding more water as needed, until mixture is soft.

Filling :

  • 24 ea. squash blossoms
  • 12 ea. lg. leaves of chard
  • 2 lbs. queso fresco
  • 1 Tbs. sea salt

Method

In a bowl, mix salt into the cheese. Open each blossom and stuff about an ounce of cheese into the flower. Twist the tops and fold under placing them on a ½ sheet pan and hold until assembly. Blanch chard in boiling water for 30 sec. and remove the large part of the stem and place leaves under damp towel until ready to assemble

 For the Sauce :

  • 4 ea. prickly pears
  • 12 ea. dried guajillo peppers
  • 1 tsp. achiote powder or paste
  • 2 cloves garlic
  • ½ cup cilantro leaves
  • 1 Tbs. sea salt

Method

Remove the seeds from the chili’s and lightly toast over open flame for about 20 seconds on each side. Boil water in a pot and submerge the chili’s in the water with the heat turned off and covered with a lid. Let chili’s soak for at least 1 hour. Remove the chili’s and blend them in a blender until smooth. Strain through a fine mesh strainer to remove any skins and reserve. Wash prickly pears in cold water to make sure all fine hairs are removed. Cut into quarters and blend until smooth. Strain through fine mesh strainer. Return both purees to blender and add garlic, salt and cilantro. Blend until smooth; adding a little of the chili soaking water to loosen the sauce if needed. Cook the sauce in a small sauce pan for 15 min on low to bring all the flavors together.

To Assemble :

Place the blanched chard leaves out on a clean work surface. Spread about a half cup of the prepared masa in the center of each leaf about 3 in. x 2 in. place two of the stuffed blossoms in the center of the masa. Fold the leaf over lengthwise so the masa meets the opposite side enclosing the filling. Fold the ends under to form a neat package and hold seam side down. When finished, place in steamer lined with banana leaves, corn husks or simply a towel. Place tamales folded side down and cover with another towel. Steam tamales for 3 hours. Place tamales on plate and cover with sauce and garnish with remaining queso fresco and cilantro.

 Prickly Pear's Paw Inspired by the Jungle Book and Courtesy of The Mixologists at Snake Oil Cocktail Co.

Ingredients:
1.5 oz. Good Reposado Tequila
.25 oz.Del Maguey Chichicapa Mezcal
.25 oz. Averna Bitters
.75 oz. Prickly Pear Reduction
.75 oz. Pressed Lime
Splash soda water

Shake all ingredients, excluding soda water. Strain over fresh ice. Finish with soda water.

Serve in a Collins glass and Garnish with a sprig of rosemary

Chef's notes: If you buy prickly pear from the farmers market, chances are the pricklies will have been removed. If you are looking to harvest the fruit yourself, we recommend gloves, tongs and a paper bag. The gloves, in this case, are an added precaution--use the tongs to remove the fruit from the cactus and place directly in a paper bag. Once in the kitchen, you can use the tongs and a sharp knife to carefully peel off the skin and spines or you can pull out your creme brulee torch and burn the spines off. This will allow you to handle the fruit with your gloved hands. Once you have removed the skins, you are left with a seedy mass: blend the fruit and strain. If you want the cucumber taste to be more pronounced, let the seedy mixture sit over night and strain the next day. The longer the juice stays in contact with the seeds, the more gel-like it becomes. We here at Slow Food Urban San Diego see lots of potential come Halloween for this delicious, blood-red and gelatinous blend...

If the thought of all that work gives you a headache, you can also find Prickly Pear Syrup at Specialty Produce.

If you do take to the canyons, please be mindful to leave some fruit for Mother Nature.